Details on the TP-LINK CPE210 Setup Process
troubleshoot Tp link CPE210 setup and login Issues
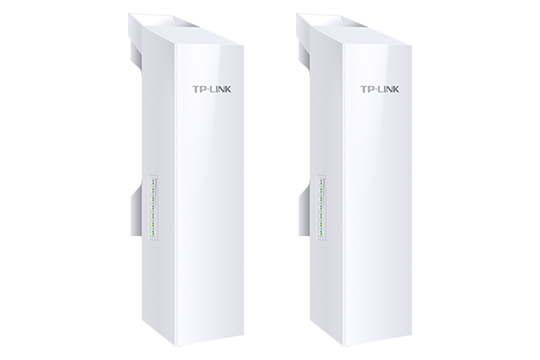
The tp link CPE210 is an outdoor CPE device for long distance transmission. This product is used for wireless outdoor connectivity. The CPE210 outdoor device operates in different modes such as an access point, bridge, repeater, and client router. By default, the CPE210 comes in client mode and you can connect the client end connection to the ISP modem. The process of the TP-Link CPE210 setup is quick and straightforward. This guide will assist you to perform the tp link CPE210 repeater setup process to extend your home network range.
LEARN MORE ABOUT THE TP-LINK CPE210 REPEATER SETUP
The tp link CPE210 is a dedicated solution for point to multipoint, point to point outdoor coverage applications. It offers a professional Wi-Fi performance to both home and business users. With the advanced antenna system, the CPE210 ensures higher gain and lower noise interference. The product comes equipped with a centralised management system. You can easily manage all your connected devices using a single PC through its PharOS dashboard. Moreover, you can perform a lot of functions such as firmware update, stats monitoring, and network maintenance through PharOS control.
The best thing about this product is that tp link CPE210 provides a quick installation and configuration process. You don’t need any technical knowledge to perform the CPE210 setup. If you want to know how to get your TP-Link device up and running, then this post is a must-read for you. Here, you will learn how to set up the CPE 210 in repeater mode.
Get prompt resolutions to tp link CPE210 woes; reach out now!
CONNECTING THE TP-LINK CPE210 SETUP OUTDOOR DEVICE
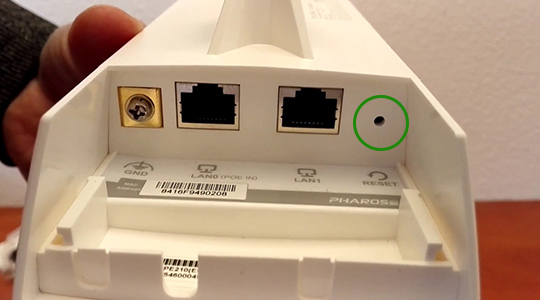
Before you start the setup, you need to make some connections between the devices. You can connect your CPE210 over a wired or wireless connection. However, it is recommended to use a wired connection to connect your TP-Link outdoor device. This product comes with two Ethernet ports: LAN0 (PoE) and LAN1 (non-PoE).
Wired Connection
- The first step is to connect CPE’s LAN0 port and the PoE passive 24 volt port on the adapter using the Ethernet cable.
- Secondly, connect another Ethernet cable from the adapter’s PoE LAN port to the LAN port on your PC.
- Then plug the PoE adapter into an electrical source and turn it on. The computer will detect the network connection and you’ll see a connected icon in the bottom right of the taskbar.
Wireless Connection
- Open the WiFi Settings on your computer or wireless settings and enable the WiFi feature.
- The computer/wireless device will scan for the available networks and a list of the same will be displayed on the screen.
- Select the SSID that belongs to your tp link CPE210 extender and then select the same. Once you select the SSID, you will see the Connect button next to the name.
- Click on the Connect button and the computer will connect to the extender network.
LOGGING INTO THE CPE PHAROS DASHBOARD
The CPE210 comes with the default settings such as the IP address, username and password. The default IP for CPE210 is 192.168.0.254. And, you can use admin for both the username and password to log in to your TP-Link outdoor CPE device.
- Now, launch a browser on the PC that is connected to the PoE adapter.
- You can use any compatible browser such as Chrome, Firefox, Internet Explorer to access the tp-link outdoor CPE configuration page.
- In the address field of your browser, type http://192.168.0.254 the default IP address of CPE210. Then hit the Enter button.
- When a login screen appears, enter the TP-Link default admin name and password in the respective fields. Click on the Login button.
- Now, you would be asked to choose your Language.
- Afterward, agree the terms of service and log in to the PharOS interface.
- Next, you would be asked to change the admin default details of your TP-Link CPE device.
- Click on the Create a new password and enter a strong, complex password in the Admin Password field.
- Then reenter the password to confirm it and save the changes by clicking on the Apply tab.
STEPS FOR THE TP-LINK CPE210 REPEATER SETUP
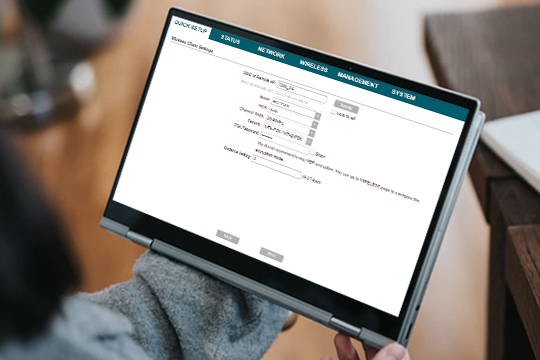
- Once logged in, you can choose an operational mode for the TP-Link CPE device.
- Turn your tp link CPE210 outdoor device into the Repeater mode from the configuration page.
- Click on the Quick Setup from the Settings menu.
- Now, click on Repeater under the Operation Mode. Click Next.
- Afterward, navigate to the LAN Settings to change the LAN IP address.
- Changing the LAN IP address is required to avoid any network conflict with access point IP.
- You need to specify the LAN IP and subnet mask for your CPE210 device.
- Now, follow the onscreen prompts provided by the setup wizard.
- Then log in to the CPE210 setup page again using the new IP address.
CONFIGURE THE WIRELESS SETTINGS
- Now, you would need to scan the main SSID name of your tp link CPE210 device to connect to the network.
- For that, click on Survey under the Wireless Client settings and the device will show you a list of available networks.
- Next, select your TP-Link SSID name from the list and connect to this network by using the wireless password.
- Then click on the Lock AP button and join the network.
- After that, you have to change the wireless password for security purposes.
On the TP-Link cpe210 setup page, you will see some terms:
- SSID of Remote AP: When you click on Lock AP, it will automatically generate.
- Remote AP MAC: This is your main router’s MAC address.
- PSK Password: This is the passphrase key to connect to the TP-link network.
- After you make all the configurations, click on the Status to review the settings.
- Then click on Finish to save the settings of tp-link CPE210 device.
The CPE210 outdoor device will reboot automatically and connect to the access point. Now, you can enjoy strong, and reliable Wi-Fi speeds across your home. The TP-Link cpe210 repeater setup process is completed successfully. Now, you can place or mount the CPE210 device at a location where you need a strong range. If you face any issues during the whole process, you can contact the technical team.
Relocating the TP-LINK CPE210 extender
Placing the TP-Link device at the right location after the configuration is very important. You should place the TP-link cpe210 device at a centralized spot from your client device. The TP-link CPE outdoor device should get at least 60% signal from the main access point. Always place the CPE device at an ideal location so that it would cover the maximum area of your home. Moreover, it can cover the areas where you get dead spots and weak Wi-Fi signals. Do not place the device in a covered area. You should place it away from any electronic devices such as Bluetooth, cordless phone, or more.

HOW DO I FACTORY RESET MY TP-LINK CPE210 OUTDOOR DEVICE?
Whether your tp link CPE210 is not working or not connecting to the network, you should first do a simple restart. A simple power cycle on the CPE210 can fix dropping connections or some common issues. However, a simple reboot doesn’t fix the problems associated with the TP-link CPE, you need to reset it to the factory defaults. You can also perform a factory reset on the CPE outdoor if you forget the Wi-Fi or admin password. There are two different ways to do the TP-link CPE reset.
- Reset through the web interface.
- Using a Reset button.
FIRST METHOD: USING THE TP-LINK WEB INTERFACE
- Firstly, launch a browser on the connected PC and type http://192.168.0.254 in its address bar.
- Next, log in with the TP-link CPE210 admin details such as username and password.
- After you log in to the tp link cpe210 setup page, look for System Tools.
- Now, click on the Factory Reset option to reset your TP-Link CPE device.
- Once done, perform the TP-Link cpe210 repeater setup process again.
SECOND METHOD: VIA A RESET BUTTON
- In this method, you need to locate the reset button on the CPE210.
- Then press the reset button located in a tiny pinhole using a paperclip.
- Make sure your CPE210 is powered on during the hard reset.
- Now, press and hold the button with a paperclip for about 5-10 seconds.
- Afterward, release the button when the System LED light starts to blink.
- All the settings of the TP-Link outdoor CPE will restore to the factory defaults.
- Now, you have to perform the TPlink CPE configuration and setup process again.
The 30-30-30 RESET Method
If the above methods don’t work for you, try to perform the 30-30-30 reset as follows:
- First, turn on the TP-Link CPE210 and locate the reset button on the product.
- Now, press and hold the reset button on the CPE device for 30 seconds using a paperclip.
- Next, unplug the CPE210 from the power source while holding the reset button for 30 seconds.
- Keep holding the reset button for 30 seconds, plug in your tp link CPE210 and turn it on.
- This method will definitely resolve the TP-Link CPE issues.
Reach out to an expert tech help team!
With the above information, you can easily do TP-Link cpe210 setup. If you face any issues, you can fix those problems using the reset instructions given in the post. For any other queries or issues, you can get assistance from the technical team. Our team of experts will provide you quick assistance with the tp link cpe210 repeater setup as well as for TP-Link Extender setup.