Facilitating network access through TP-Link CPE710 setup
The TP-Link CPE710 is a stable outdoor WiFi equipment for long distance signal transmission. It is unlike your regular wifi routers that throw signals in a certain area. With the professional-standard 23dBi directional antennas and a metal reflector, the TP-Link CPE710 setup provides excellent latency, beam direction and immunity against distortion. Getting this TP-Link CPE device can be the best decision for your outdoor wireless networking applications.

Now, since the device is itself a bit different than the regular routers, managing it and configuring it is ought to be different. The PharOS control system which is the centralized device management system, helps manage all the devices on the network. You can discover devices, monitor the status, update the firmware and perform network maintenance all from one place. If you are looking for help with the TP-Link CPE710 setup process, this blog is the one for you. You will find easy steps on how to complete the software configuration and more.
Preparing for the TP-Link CPE710 setup
The setup process for your TP-Link CPE device begins with the hardware connections. You can first decide on the location where you wish to install the device at. Consider the mounting height, and orientation, like factors while installing the same.
You can then proceed with the hardware installation part. Here are some steps you can follow:
- Start by attaching the side reflector panels to the center reflector panel.
- Next, attach the rear cover to the reflector assembly.
- Insert the Tp-Link CPE into the rear cover until the CPE locks into place.
- Connect the ethernet cable to your TP-link CPE710.
- Attach the mounting bracket to the rear cover until the mounting bracket is positioned over the pins on it.
- Now, secure it to the rear cover using bolts and wing nut.
- Finally, attach the CPE710 assembly yo the pole using the metal strap. Secure it into place by tightening the screw.
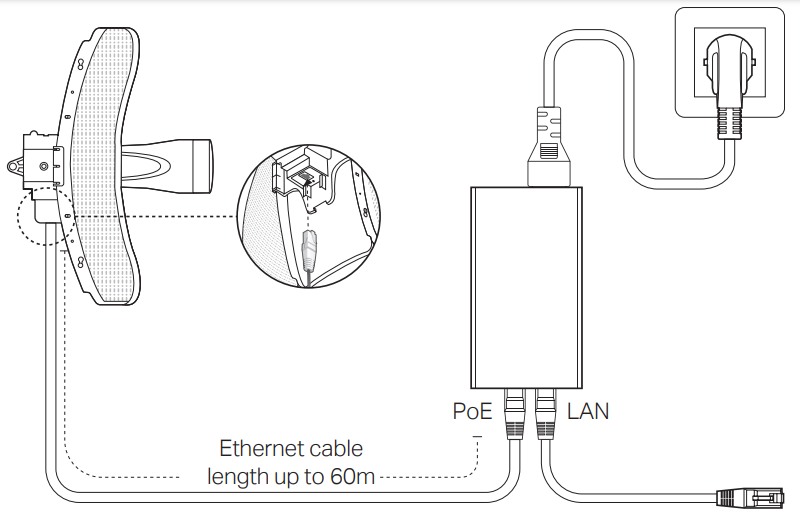
You can connect your CPE710 device to power in a manner as illustrated in the image:
Mount the PoE Adapter
- Ensure that the passive PoE adapter is attached securely. You can do that by installing the adapter with the ethernet port facing upwards.
- You can drill holes on the wall and insert the plastic wall anchors into the holes. Then, secure the mounting bracket into the wall.
- Once done, attach the passive PoE adapter to the mounting bracket by sliding the adapter in the direction of the arrows as indicated until it locks into place.
TP-Link CPE710 Setup
You can proceed with the software configuration on your TP-Link CPE710 device using some simple steps. Here are some steps you can follow:
TP-Link CPE710 login
Before you log in to the Tplink CPE710 device, you will need to assign a static IP address to your computer. This will range between 2 and 253. Here are some steps you can follow:
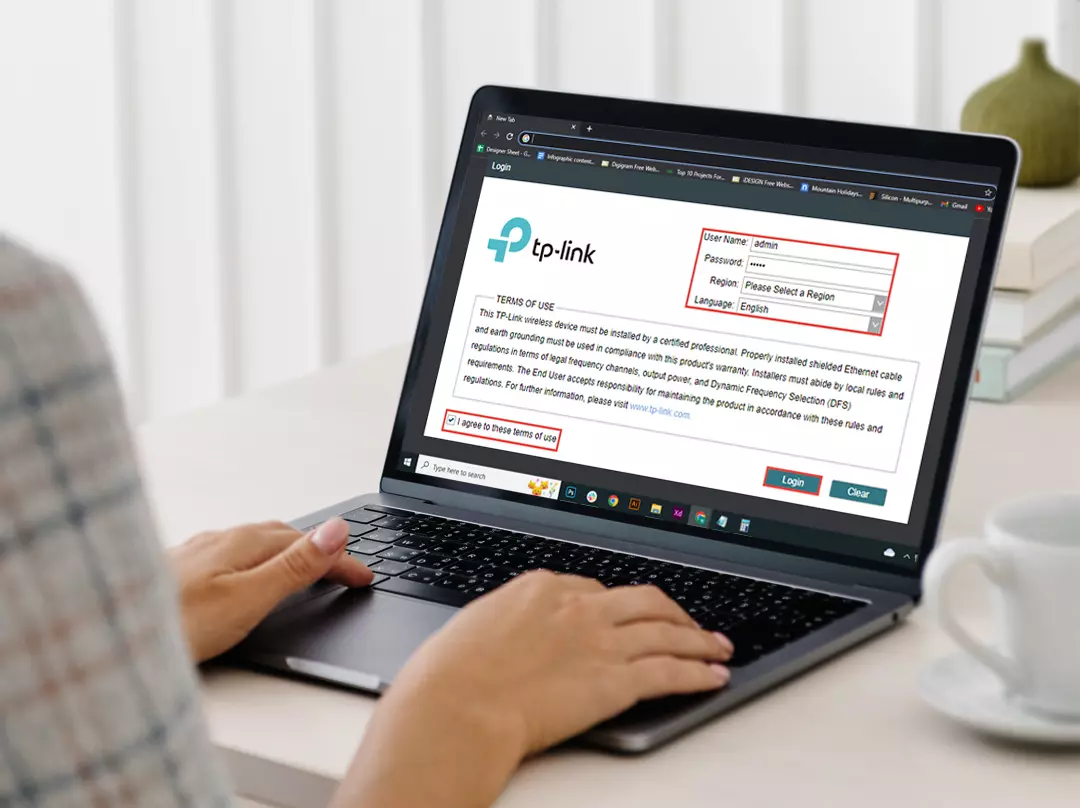
- Launch a web browser and in the address bar, type the default login address http://192.168.0.254. Press Enter.
- In the username and password fields, type admin and select the language from the drop-down list.
- Read through the terms and conditions statement and then click on the Login button.
- You will now be prompted to change the default username and password values. Once you have changed them, you can start with the TP-Link CPE710 setup.
Configuring the Access Point
- Login to the PharOS login page or the TP-Link CPE710 setup wizard.
- Select Operation Mode and head to the Access Point Now, click on the Next button.
- Again, select LAN settings and click on the Next button.
- Edit the Wireless AP Settings Create a new SSID for the wireless network.
- Next, select a security method as WPA2PSK and assign strong password to protect the network.
- Type in the distance between the access point and the client device in to the Distance Settings
- Now, select the radio button next to MAXtream and click on the Next button.
- Finally, verify the settings and click on the Finish button to complete the configuration process.
Configuring the Client
- Login to the PharOS login page and head to the setup wizard.
- Select Operation Mode and head to the Client Now, click on the Next button.
- Change the IP address to 192.168.0.2 and click on the Next button.
- Click on the Survey button under Wireless Client Settings and select the SSID of the access point from the list of APs. Then, select Connect.
- Again, select WPA2-PSK as the security method and enter the password and distance value of the access point. Once entered, click on the Next button.
- Finally, verify the settings and click on the Finish button to complete the configuration process.
The TP-Link CPE710 setup process is now complete and you can begin using seamless internet on-the-go.